- Select Tools –> Workflow Designer or File->New worflow items in the main menu.
Result: The Workflow Designer window appears.
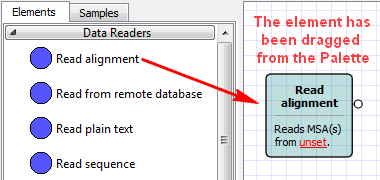
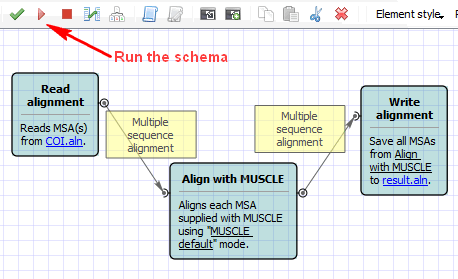
- On the Elements tab of the Palette find the Read alignment element. It is located in the Data sources group and drag it to the Scene.
Result: The element is shown on the Scene.
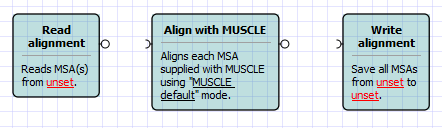
- Repeat the previous step for the Write Alignment element from the Data sinks group and for the Align with MUSCLE element from the Multiple sequence alignment group.
Result: All three elements are on the Scene.
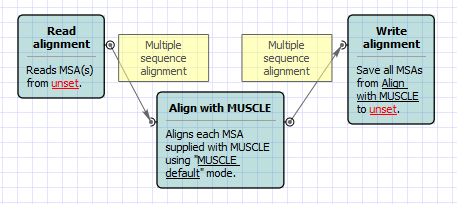
- Connect the elements:
- Drag an arrow from the output port of the Read alignment element to the Align with MUSCLE element.
- Drag an arrow from the output port of the Align with MUSCLE element to the Write alignment element.
Result: The elements are connected with arrows.
- Select the Read alignment element. In the Parameters area of the Property Editor click on the Value column of the Input files parameter:
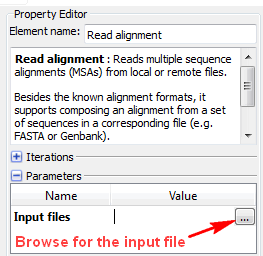
- And browse for an input file, e.g.Select the $UGENE\data\samples\CLUSTALW\COI.aln file.
Result: The Input files value is set to the file’s path.
- Select the Write alignment element and set the Output file, e.g. you can just enter result.aln.
Result: All required workflow parameters are set.
- Click the Run workflow button on the toolbar.
Result: After the workflow has run, a blue notification has pop up.
- Open the the result.aln file in UGENE.
Result: The file has been opened. It contains the result of the alignment with MUSCLE.